At long last, operation sexy kitchen is underway. And it’s been a slooow, labor-intensive process. At no point have we really enjoyed any of the work involved, but we are motivated to make our kitchen look less builder-basic and more beautiful. Before I get too wordy about the whole process, here are the before and after shots.
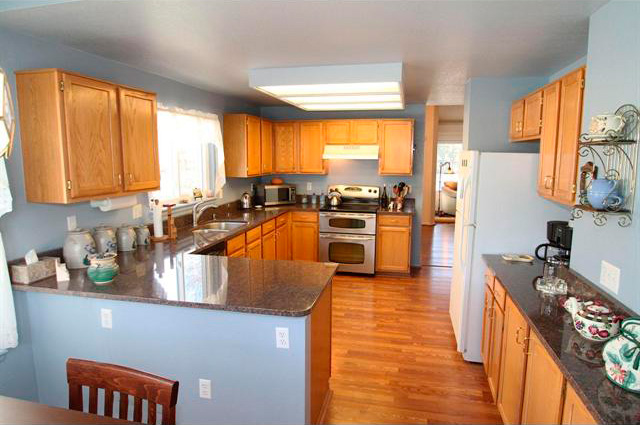
This is the kitchen before we bought the house. It had blue walls and oak cabinets.
Then we painted the walls Behr’s Hazy Sage and painted the range hood black.

And here it is now after painting the cabinets Benjamin Moore’s Snowfall White, spray painting the hinges ORB, and replacing the brass handles with new Lowe’s hardware.

To launch this journey, we first removed all the hardware from the cabinets. This included hinges, baby proofing locks, and handles. We saved all the hardware we planned on using again in a plastic container, but we will be donating the brass handles to have a new life somewhere else.


Since we were replacing the cabinet door handles with knobs, we needed to fill in one hole on each door with wood filler. We applied a dab of Elmers Carpentry Wood Filler to the surface of the hole, then smushed it down with a putty knife, scraping it to smooth it out.


After the wood filler had dried about half an hour, we then used 220 grit sand paper on a sanding block to smooth over the filled in holes. We then used an old t-shirt to wipe down the cabinet doors and frames {all surfaces that would be getting painted} with Klean Strip Sander Deglosser.

Next, we taped off the floors and inside the cabinet frames with tape. I like to cut in by hand with an angled brush, but any spot I couldn’t get to cleanly, I taped off. We also moved things that were in the way out of the cabinets, but we didn’t empty them all the way out since this would have made our kitchen impossible to get around in.
We then primed one side of the doors and all the cabinet frames with Zinsser oil-based primer. We used a high density small foam roller, and any place the roller couldn’t get to we used a 2″ angled brush. My favorite brand of brush for cutting in is the Wooster shortcut. It has a short, soft handle which makes it easy to control the strokes. It’s perfect for cutting in by hand, especially when painting walls. It’s also about $6, making it much less expensive than other brands of brushes. You can find it at Home Depot or Lowe’s.

If possible, set every door on top of something to give you easy access to painting the edges {think paint can, coffee can, shoe box, etc}.

This primer is rather thick and goopy, and dries fairly quickly. The key is to work as quickly as possible, and apply as thin and even a coat as possible. Don’t be discouraged if there is a paint glob or drip that dries before you can smooth it over. This can be sanded later. Also, it is acceptable to prime in the fetal position. At this point we had been working about 5 hours and I was exhausted and overwhelmed.

After the primer dried {we waited a day, but the label says it will dry in an hour}I used my sanding block with 220 grit sand paper to very lightly sand any uneven surfaces on the cabinet doors or faces. Like I mentioned earlier, the primer is glue-like in consistency, so getting smooth coats was nearly impossible. The sanding was nice to even things out.

After sanding things down, we wiped the cabinets down with a damp rag to remove the dust. We flipped the doors over and repeated the priming, sanding, and wiping. After that, it was *finally* time to start painting them! Now if you were concerned about having perfectly smooth cabinets without any wood grain texture showing through, you may want to apply a second {even a third} coat of primer, with a light sand in between coats. However, painted wood grain texture doesn’t bother us a bit, so we stuck with just one coat of primer. The paint we chose was Benjamin Moore Advance in Snowfall White. It was recommended due to it’s extended open time {takes longer to dry, so makes it easier to paint even coats} and good leveling {smooth without brush strokes}. I have to say that after painting the bathroom cabinets with Behr paint it has seemed to scratch off or get dings in it fairly easily. We have already had to touch up some spots. We are much more impressed with the durable finish of the Benjamin Moore Advance. We used the same type of high density small foam roller to apply paint to all the major surfaces of the cabinets, again using a 2″ brush for hard to reach angles {I used a new brush for this, just to make sure the bristles were in good shape}.

We waited a full day between applying coats. The label recommended waiting at least 16 hours between coats. It took three thin coats of paint to give us the coverage we needed. We painted the cabinet frames and the back side of the cabinet doors first, then flipped the doors over and painted three coats on the front side. That’s nearly a week of painting cabinet doors. We did the drawers last, just because we ran out of space in our garage. Ugh.
Meanwhile, we also painted our brass hinges. Since we were replacing the brass handles with oil-rubbed bronze knobs and handles, we decided to spray paint the hinges to match. This saved us from buying 58 hinges. Fifty eight. Whew! I used the same method that we used when we painted our doorknobs and hinges previously. Basically, we rubbed the hinges with steel wool, deglossed, layed them on cardboard and sprayed thin, even coats of Rustoleum’s Universal Surfaces in oil-rubbed bronze. It took about three to four light coats, with a half hour drying time between coats. Once that had dried a full day, we sprayed on three thin layers of Deft semi-gloss clear coat, again waiting 30 minutes between coats. The hinges did need to be flipped over to get to all the surfaces with the spray paint.


After we were done painting everything, we waited a full 3 days to wait to apply hardware and rehang the doors and drawers. The hardware is from Lowe’s. This is what our kitchen looks like now:


The other night we rented The Amazing Spiderman, which as it turns out, was not at all amazing. As a result, I had time during the movie to make the EAT letters over the stove using mod podge, MDF letters, and scrapbook paper. It was a fun, easy, and inexpensive little project that added some much needed color to the space.

We have more work to do in the kitchen. In the near future we plan on updating the window treatments, making a drum shade for the pendant light in the breakfast nook, possibly repainting the table and chairs in the nook, hanging some art, and adding some crown molding to our cabinets. I’ve even thought about distressing or glazing the cabinets. Blake is itching to get rid of that unsightly fluorescent light box and install some recessed can lights. But for now, we are going to sit back and enjoy our white cabinets.
I heard a French saying on House Hunters International the other day, “petit à petit l’oiseau fait son nid,” which means little by little the bird builds its nest. It’s a lesson in patience for life’s gradual processes, but in the case of our “nest” it is my new motto. Little by little!
