Our entryway used to look like this: 
It was ok, but the space was lacking personality. I didn’t like the rug, or the big blank wall adjacent to the door.
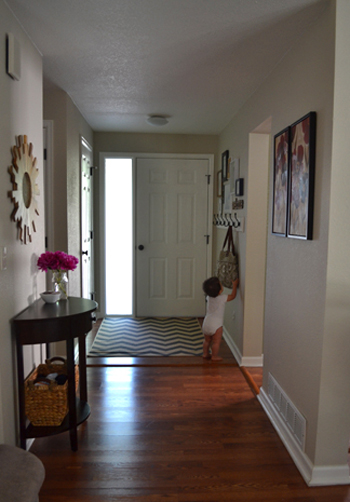
Now it looks like this {pardon the baby photobomb}:
We made some minor improvements, starting with a new rug. I found this chevron rug from Overstock. It’s an indoor-outdoor rug, so when it gets dirty we can just hose it down. Practical and cute.
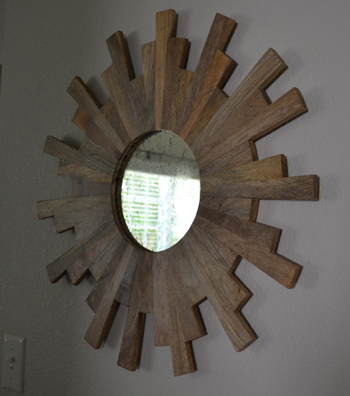
We also changed up the mirror over the console table. I wanted something non-square to soften up all the squares and rectangles we have in our house. I nabbed this one from Target using my birthday money last month. 
 We also DIY-ed a coat rack to give our guests a place to hang their coats.
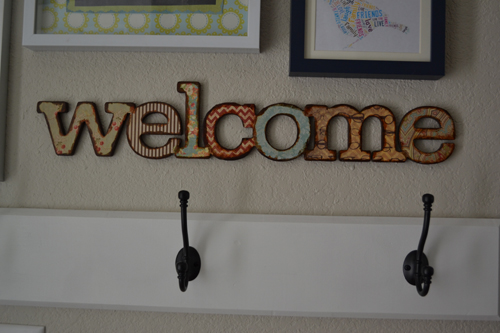
  I gathered some picture frames I had been slowly accumulating and made the space above the coat rack into a gallery wall. I hung everything up when Noah was napping one afternoon using the handy paint stirrer method. The thing I love the most about gallery walls is that they are easy to change up. You can swap out art or add/switch out frames as needed to suit your tastes. Also, they are a relatively inexpensive way to decorate a large wall space. Since pretty much all of the art in this gallery was printed at home or DIY-ed, the cost was only for the frames. I’m loving the mixed and matched look of this frame gallery. It’s more casual and less intentional than the other galleries we have in our home {see the nursery here and the living room here}. This welcome sign was a fun DIY craft I did with my sister-in-law, Melissa. We bought the chipboard welcome letters and used mod-podge, paint, distressing ink, and scrapbook paper to make it pretty. We ended up staying up into the wee hours of the morning to finish it, but it was worth it! And after that Melissa became a mod-podge addict. The possiblities are endless. I actually used 3m command adhesive strips to hang this bad boy up.
  This is my favorite piece of art. Real art, as it is a watercolor that my mom painted for me for my birthday. She is a talented artist in many different areas {pottery, painting, music} and I am excited to have this painting be the focal point of the collage. It was irregularly sized, about 9×12, and I didn’t want to cut off any of the picture with smaller 8×10 frame. I found this frame at Ikea and will probably have a mat cut for it later.
  This 4×4 wood frame hails from Target’s Threshold collection. I scooped it up a few months ago with a coupon. I printed a map of Manhattan, KS to frame in it. Blake and I both went to college there and since it’s where we met, fell in love, and got engaged, it will always be a special place to us.
  Here is another Target Threshold frame. The picture is of Blake and I in Lucerne, Switzerland on our backpacking trip to Europe in the summer of 2010. I had that photo in a different 4×4 frame, but decided it would look better in this white frame. However, I’ll probably replace it with a picture of Noah as soon as I get one printed.
  This is a 12×12 white frame from Target. I originally had it in Noah’s nursery, but decided to move it down here. I didn’t have any art for it, so I did a quick google search for “free printable art.” I found this cute heart here. It comes in different sizes and colors, but I printed the 8×10 in chalkboard. Since it wasn’t big enough to fill the frame, I cut it into an 8″ square, and layered it on top of some scrapbook paper to give it a matted effect.
  Here is yet another Target frame. I found the bible verse art {Joshua 24:15} at The Flourishing Abode. It came in different colors, and there were a lot of other verses to choose from. I picked this one because I love the verse, and the color scheme complimented the rest of the gallery. The original download was larger than the size I needed, so I resized it in photoshop.
This frame was one we’ve had on hand for ages. I wanted to have something optometric up there, but couldn’t find anything online. I quickly whipped up this “See the good in all things” art in photoshop.
This bird is a free printable from the website www.tagxedo.com. It’s a pretty cool site that allows you to make tons of different shapes using any words of your choice. You can customize the colors as well. I used this site to make a whale for Noah’s nursery. This was the last frame I had to fill, so I made this cute little bird. I’m not completely in love with it though, so I could see this changing in the future. The frame is a small Ikea Ribba frame that I had on hand. It was originally wood toned, but I painted it navy blue using Martha Stewart craft paint. I used the 3m command adhesive strips to hang this one up.  It’s feeling a lot cheerier in the entryway now. There are a few more changes I would like to make that should be pretty easy. More to come!
Update with some FAQ’s:
To see how we built the coat rack see this post. I have heard that not all Lowes have the oil rubbed bronze hooks in stock, but they can also be found here on Amazon.
Also, the paint color is Behr’s Aged Beige from Home Depot in a flat finish.


